Quick answer
Sow celeriac indoors in early spring, raise the seedlings in warmth and plant them outside after frost risk has passed, with the crown at soil level and about 30cm between plants. Give them rich, moisture-retentive but well-drained soil and keep growth moving with consistent water. The swollen stem base develops mainly from late summer into autumn and is usually ready from October.
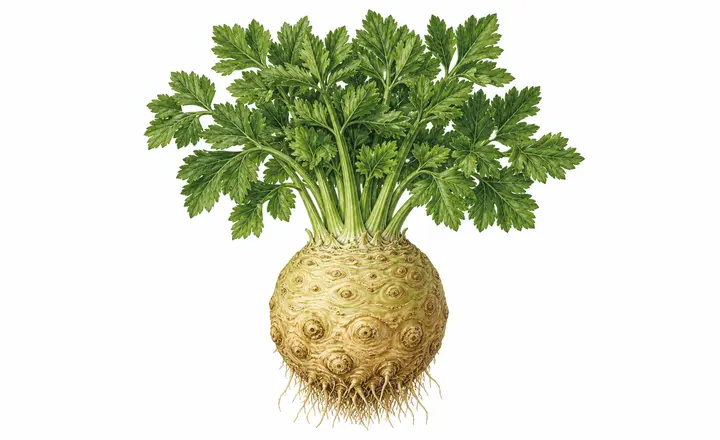
Celeriac is a long-season form of celery grown for its knobbly swollen stem base, often called celery root. It is not a quick substitute for turnip: the crop needs an early start, several months in the ground and dependable moisture. The RHS celeriac guide identifies consistently damp soil and at least six months to maturity as the key constraints.
Conditions that determine success
Choose full sun where summers are mild; light shade can be useful on a hot, drying site. The best soil is fertile, moisture-retentive and well drained. Incorporate mature garden compost before planting, especially on light soil, but do not create a permanently saturated bed. A practical target is pH 6.0–7.0, the range given in the University of Kentucky Center for Crop Diversification profile. Test soil before liming or trying to correct a suspected nutrient shortage.
Three checks matter most:
- Enough season: sow early under cover rather than waiting for outdoor soil to warm.
- No cold check while young: chilled seedlings may bolt instead of making a useful base.
- No prolonged drought: interrupted growth usually means a smaller, coarser crop.
Celeriac is a biennial grown as an annual. Established roots are hardy enough to stand through much of a UK winter, but young plants are cold-sensitive. These statements describe different growth stages and are not contradictory.
Sowing and raising transplants
Sow thinly in March on moist peat-free seed compost. Cover with only a light sprinkling, keep at about 15°C and expect germination to be slow or uneven. The RHS notes that it can take up to three weeks. A propagator lid or clear cover can retain humidity, but ventilate it and remove it after emergence.
Move seedlings into bright light and keep them above 10°C. Thin modules to one seedling, or prick seedlings from a tray into individual modules once they can be handled by a leaf. Never lift them by the delicate stem. Keep the compost evenly moist without leaving it waterlogged.
Pot on if roots fill the module before outdoor conditions are suitable. Harden plants gradually, but bring them under protection if a cold spell is forecast. Buying spring plug plants is a sensible alternative when only a few plants are needed.
Planting in the ground
Plant after the danger of frost has passed, usually in late May or early June in the UK. Set plants 30cm apart, with 40–45cm between conventional rows. The University of Maine celeriac trial found that spacing affected marketable yield and recorded much of the edible hypocotyl enlargement late in the season; for a home crop, 30cm gives each plant room while agreeing with RHS guidance.
Keep the top of the module root ball level with the surrounding soil. Burying the crown can restrict the swelling stem base and trap moisture around new growth. Water each plant thoroughly and use temporary fleece or cloches only while needed for establishment; ventilate and remove covers before they crowd foliage.
Containers and spacing
Celeriac can grow in a container, but a bed is easier to keep moist over its long season. For one plant, use a pot at least 30cm across and about 20 litres, with roughly 30cm of usable compost depth and unobstructed drainage. This is a practical minimum based on the crop's final spacing and root run, not a cultivar guarantee. General University of California container guidance places celery among vegetables needing 30–45cm of compost depth and warns that small containers restrict growth and dry quickly.
Use fresh peat-free potting compost, leave space below the rim for watering and keep one plant per minimum-size pot. A larger planter buffers temperature and moisture better. Do not stand the pot permanently in stagnant water.
Watering, feeding and crop development
Keep the root zone consistently moist from transplanting until harvest. Water thoroughly when the surface starts to dry rather than repeatedly wetting only the surface. Mulch established plants with compost to slow evaporation, leaving the crown exposed. Containers may need checking every day in warm or windy weather.
Celeriac needs fertile ground, but feed by evidence. Use a soil test before planting where possible; in a container, use a complete feed at the label rate once the compost's initial nutrients are being depleted. Pale leaves can also result from cold roots, waterlogging or root damage, so fertiliser is not an automatic cure.
No support is needed, and flowers are a failure signal in a first-year food crop rather than a stage to encourage. As the base swells, remove damaged leaves and any side-shoots. Outer leaves that naturally fall flat can be taken off gradually to expose the crown, but keep the upright, healthy foliage that powers growth. There is no need to earth up the base.
Diagnosing common problems
| Symptom | Likely causes to investigate | First checks |
|---|---|---|
| Flower stalk forms before a useful base | Seedlings chilled, severe growth check or unsuitable timing | Temperature history and sowing date |
| Healthy leaves but a very small base | Late sowing, shade, crowding, buried crown or interrupted growth | Planting depth, spacing and length of season |
| Base is very knobbly or has many side roots | Cultivar trait, uneven growth or a crown kept too wet or deeply buried | Cultivar description and soil line |
| Young leaves are ragged; holes or slime are present | Slugs or snails | Search at dusk and beneath nearby cover |
| Pale winding mines or scorched patches cross leaves | Celery leaf miner | Hold a leaf to the light and look for larvae or mines |
| Brown or grey leaf spots spread in damp weather | Celery leaf spot or another leaf disease | Lesion pattern, airflow and time foliage stays wet |
| Crown or base becomes soft and foul | Waterlogging, tissue damage or rot | Drainage, planting depth and firmness |
Remove badly affected leaves and clear crop debris rather than reaching first for a pesticide. Protect seedlings physically from slugs where practical, rotate away from celery and other Apiaceae after persistent disease, and use only products authorised for the crop and problem in your region, exactly as the current label directs.
Harvest, storage and end-of-season care
Begin lifting when the swollen bases are large enough to use, commonly from October. Ease them out with a fork so the base is not cut. Trim off fine roots and foliage, but avoid gouging the storage tissue. Flavour becomes stronger as the crop stands.
On free-draining ground, leave sound plants in place and lift them as required through winter. Mulch around—not over—the crowns where frozen ground would prevent harvest. On heavy or winter-wet soil, lift the crop in late autumn before rots develop. The RHS gives a typical UK harvest window of October to March.
For short-term use, refrigerate cleaned roots. For longer storage, select undamaged bases, trim the tops and keep them cold and humid so they neither freeze nor shrivel. Iowa State University Extension reports three to four months under controlled near-freezing, high-humidity storage; an ordinary shed may not maintain those conditions, so inspect stored roots regularly and discard any that soften or rot. The RHS alternative is to pack lifted roots in peat-free potting compost or coir in a cool, frost-free place.
Remove bolted, diseased and decaying plants at the end of the season. Do not save seed unless you can isolate celeriac from compatible flowering celery and keep selected plants through their second year.
Sources and review basis
- How to grow celeriac — Royal Horticultural Society
- Celery and celeriac crop profile — University of Kentucky Center for Crop Diversification
- Celeriac evaluation: 2022 research report — University of Maine Cooperative Extension
- Storing winter storage vegetables — Iowa State University Extension
- Container gardening basics — University of California Agriculture and Natural Resources
UK sowing, planting and harvest timing is based primarily on the RHS. Spacing trials and North American storage conditions are supporting evidence, not promises for every cultivar or climate. Follow the seed packet for cultivar-specific maturity and bolting resistance, local frost guidance for planting out, a soil test for amendments and current product labels for any crop treatment.