Quick answer
Sow turnips directly into fertile, moisture-retentive soil in small batches from spring to late summer. Thin to 10cm for small roots or wider for maincrop varieties, keep the soil evenly moist and harvest while roots are young and tender. The leaves and thinnings are edible too.
Turnips are fast-growing brassicas rather than miniature swedes. Early types can be ready in about six weeks, while maincrops take longer and are grown for autumn. Cool conditions give the mildest texture and flavour.
Choose roots, leaves or both
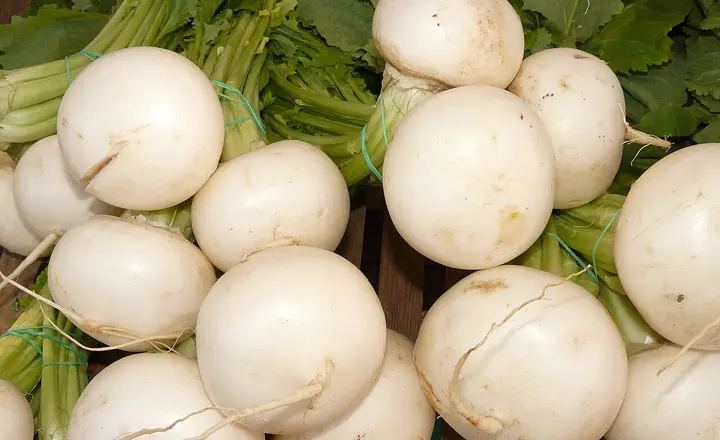
Early salad turnips are harvested around golf-ball size and can be eaten raw or cooked. Maincrop varieties form larger roots for autumn use. Some cultivars are selected primarily for leafy greens and can be sown more densely.
The RHS turnip guide distinguishes early sowings from March to June and maincrops sown in July to mid-August. Adjust dates for local heat and the packet's maturity range.
Site, soil and rotation
Choose full sun or light partial shade with fertile soil that drains freely while retaining moisture. Prepare a fine surface for direct sowing. Incorporate mature organic matter ahead of the crop rather than leaving fresh clumps in the root zone.
Turnips share clubroot, root fly, flea beetles and caterpillars with kale and other brassicas. Rotate related crops where practical. Soil around pH 6.0–7.5 is suitable; test before attempting pH correction.
Sowing and thinning
Make a shallow drill, water it if dry and sow thinly. Small batches every few weeks produce a steadier harvest than one long row. Thin once true leaves appear, leaving around 10cm for baby roots and up to 23cm for larger maincrops.
Use the thinnings as salad leaves if they are clean and sound. Do not transplant spare seedlings for root production, because disturbance can deform the storage root. Keep the row weed-free while plants are small.
Growing in containers
Use a pot at least 40cm across and approximately 15 litres for a useful group of mini turnips. Fill it with peat-free compost, water before sowing and thin to around 10cm. Do not leave every seedling simply because it fits at first.
Check moisture frequently; small containers can dry within a day in warm wind. Harvest roots young so the space can be reused for another sowing.
Watering and crop protection
Maintain steady moisture. Drought slows growth and can make roots woody, bitter or prone to splitting after rain. Mulch only after seedlings are large enough not to be buried.
Flea beetles make small shot holes in young leaves, while caterpillars and pigeons can remove larger areas. Fine insect mesh protects against several flying pests when sealed at the edges. Slugs may take seedlings beneath any cover, so continue inspecting.
Diagnosing common problems
| Symptom | Likely causes to investigate | First checks |
|---|---|---|
| Roots are woody or bitter | Heat, drought or over-maturity | Root size and moisture history |
| Roots split | Heavy water uptake after dry soil | Rainfall and irrigation pattern |
| Many leaves but tiny roots | Crowding, excess nitrogen or shade | Spacing, feed and light |
| Small shot holes | Flea beetles | Seedling leaves and cover gaps |
| Roots distorted and plant wilts | Clubroot | Root swellings and crop history |
| Plant flowers early | Heat, drought or delayed harvest | Sowing date and root size |
Harvest and storage
Pull early turnips when the roots are between golf-ball and tennis-ball size, depending on intended use. Harvest maincrops from autumn before roots become coarse. Loosen dry or heavy soil first to avoid snapping foliage.
Remove tops from stored roots so they do not draw out moisture. Keep sound roots cold and humid and inspect them regularly. Young leaves are best used promptly; do not remove too many when the main aim is root growth.
Sources and review basis
- How to grow turnips — Royal Horticultural Society
- Growing turnips and rutabagas — University of Minnesota Extension
Turnip quality changes quickly with heat and maturity. Harvest size is a better guide than the maximum days printed on a calendar.