Quick answer
Start edible ginger from a firm rhizome with visible growth buds, keep it warm while it sprouts, then grow it in a broad, free-draining pot with bright filtered light. Water sparingly before shoots appear and more consistently during leafy growth. In the UK, plan for a warm indoor or greenhouse crop; an ordinary outdoor bed rarely supplies a long enough warm season for mature ginger.
Choose your harvest goal before planting. Tender baby ginger is a realistic short-season crop, while the brown-skinned ginger familiar from shops needs a longer growing period. A movable pot lets you bring the plant under protection as autumn cools.
Choose the right ginger and planting stock
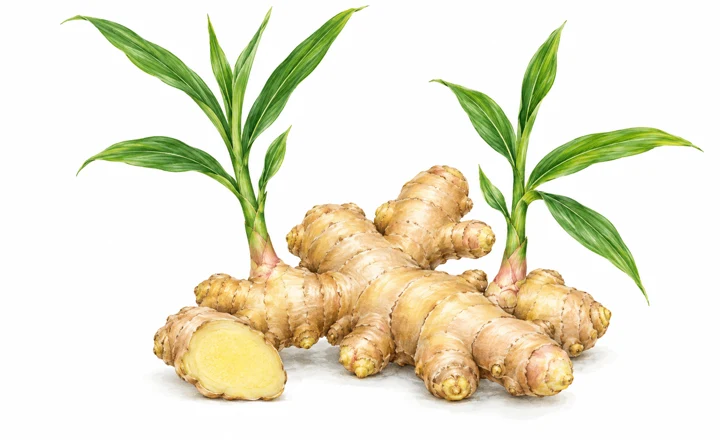
This guide covers culinary ginger, Zingiber officinale, in the Zingiberaceae family. The edible “root” is actually a rhizome: a horizontal stem that produces roots and leafy shoots. Ornamental ginger lilies are different plants; do not use a common name or the illustration here to identify something for eating. UF/IFAS distinguishes edible ginger from ornamental gingers.
Buy rhizomes sold for planting from a reputable supplier, ideally with information about their health and cultivar. Supermarket ginger can sprout, but its disease status and storage treatment are uncertain. For an experiment, choose a firm piece with swelling buds and grow it separately from established crops. Reject soft, mouldy or decaying pieces. Organic labelling alone does not certify planting stock as disease-free.
Match warmth and light to your conditions
The RHS ginger profile recommends a heated greenhouse border or an indoor container, with rich, well-drained soil, filtered sunlight and humidity. It gives 25–28°C for propagation. Use a thermostatically controlled propagator where a windowsill cannot maintain this warmth; avoid a pot touching a hot radiator.
Aim for a root zone around 20°C or warmer during active growth, rather than treating “frost-free” as sufficient. Wisconsin Extension describes best growth near 25°C soil temperature. Measure compost temperature if growth stalls: a sunny afternoon does not reveal how cold the pot becomes overnight.
Partial sun is suitable. NC Cooperative Extension gives 2–5 hours of sun for ginger and turmeric. The quick-reference figures of two hours minimum and four preferred are planning guides, not a guarantee of yield. Bright surrounding light still matters. Morning sun with protection from fierce afternoon sun is a useful starting position; a dim room corner is unsuitable.
| Growing space | Practical approach |
|---|---|
| Warm, bright room | Start early; allow room for tall foliage and turn the pot for even exposure |
| Heated greenhouse | Best control over season length; ventilate and shade when necessary |
| Unheated greenhouse | Useful in summer, but arrange a warmer spring start and autumn refuge |
| Sheltered patio | Summer trial only; move gradually into outdoor light and protect from cold |
Sprout rhizomes in late winter or spring
For a UK trial, February or March is a useful starting window if you can provide warmth and light afterward. This adapts Illinois Extension's short-season approach; starting early in a cold room gives little advantage.
- Keep a small rhizome whole, or divide a larger one with a clean knife so each section retains at least two buds.
- Let cut faces dry and seal for a few days before planting.
- Lay the piece horizontally, buds upward, in moist peat-free potting compost. Cover with about 2.5cm of compost, following the shallow-start method described by Wisconsin Extension.
- Keep warm and only lightly moist. Once shoots emerge, supply bright light and increase watering as roots and leaves develop.
Emergence can take several weeks. Do not repeatedly dig up a sound rhizome to check progress. Label the pot with its start date, and investigate temperature and moisture before assuming that a slow piece is dead. Discard material that becomes soft or rotten.
Choose a pot, compost and spacing
For one starting piece, use a final container about 30cm or more across and around 20 litres. These are practical planning minimums, combining Virginia Extension's 12-inch pot guidance with the roughly five-US-gallon single-rhizome option in UF/IFAS guidance. A broad base helps prevent toppling. Small starter pots are useful for propagation, but leave room for later expansion.
Provide drainage holes and empty any saucer after watering. Use fresh, moisture-retentive potting compost that drains freely. In a protected border, improve soil structure with mature compost and allow about 45cm between plants, adapting UF/IFAS's 1.5-foot field spacing. This is a roomy layout rather than the only workable density.
A soil pH of 5.5–6.5 is a useful target from UF/IFAS Marion County guidance. Test border soil before adding amendments. In containers, start with suitable compost rather than trying to change its pH with kitchen ingredients.
Water, feed and maintain growth
Check moisture below the surface before watering. Once the plant is leafy, water thoroughly and allow excess to drain; do not leave the rhizome in saturated compost. Pot size, weather and leaf area determine frequency, so a fixed weekly amount is unreliable.
Feed actively growing container plants with a balanced fertiliser suitable for edible crops, following its label and allowing for nutrients already in the compost. Do not add several feeds together. UF/IFAS cautions that excess fertiliser salts aggravate moisture stress and that dormant plants do not need feeding.
Keep weeds out of border plantings and inspect drainage holes periodically. If expanding rhizomes become exposed, add a little compost while retaining a watering lip. Repeated deep earthing-up is unnecessary for this container method. Leave healthy foliage intact to support growth; remove dead stems. Flowers and pollination are not required to obtain a rhizome harvest.
Check problems before changing the care routine
| Symptom | Check first | Response |
|---|---|---|
| No shoots after several weeks | Compost temperature and rhizome firmness | Maintain warmth; avoid soaking to force growth |
| Wilting with wet compost | Blocked drainage or decaying roots | Stop adding water; inspect and discard rotten material |
| Brown leaf tips after moving outside | Sudden stronger sun and moisture stress | Acclimatise gradually and soften afternoon exposure |
| Pale stippling or fine webbing | Leaf undersides for red spider mite | Isolate affected pots and seek a suitable glasshouse control |
| Gradual autumn yellowing | Falling temperature and seasonal dormancy | Reduce watering as growth slows; distinguish this from rot |
| Little new ginger at harvest | Warm-season length, light and pot crowding | Record conditions and start earlier with protection next season |
The RHS identifies glasshouse red spider mite as a possible pest. Do not diagnose a named disease from yellow leaves alone. Keep suspect plants separate, clean tools between pots and avoid saving rhizomes from unhealthy plants.
Harvest baby ginger or wait for maturity
Wisconsin Extension describes baby ginger harvest after roughly four months, while mature ginger commonly takes eight to ten months. Count useful warm growth rather than expecting a planting-date calculation to guarantee readiness. For a spring-started UK pot, September–October is a practical inspection window, not a fixed maturity date.
Gently uncover an outer section to see whether new rhizomes have formed. Baby ginger has delicate skin and tender flesh; mature ginger is firmer and more fibrous. Either can be used in cooking. Waiting for brown skin outdoors as winter approaches risks losing the crop.
Tip a container out onto a sheet and loosen compost by hand. In a border, lift carefully from outside the clump. Avoid pulling on stems or scraping the skin. Separate sound rhizomes from any decayed original planting piece. If continuing the plant, take only an outer portion and leave a healthy section with buds.
Store the crop and overwinter planting material
Baby ginger is not a shelf-stable substitute for shop-bought mature ginger. NC Cooperative Extension advises refrigerating, using or processing it promptly. Wash gently before use; freeze clean surplus in usable portions instead of expecting thin-skinned ginger to keep on the kitchen counter. Discard mouldy or soft, decaying pieces.
Keep planting stock separate from the kitchen harvest. For a container overwintering method, retain healthy rhizomes in their pot in a protected place above about 13°C, following Virginia Extension. Once fully leafless and dormant, stop routine watering and feeding; restart cautiously when new shoots appear. Inspect periodically for rot. Do not store rhizomes intended for replanting in the refrigerator.
For another protected warm-season crop, compare the sweet potato guide. Use the plant guide directory to choose alternatives if you cannot provide ginger's winter protection or growing-season warmth.
Sources and review basis
- Common ginger — Royal Horticultural Society
- Ginger, Zingiber officinale — Wisconsin Extension
- Growing Ginger at Home — Virginia Cooperative Extension
- Ginger, Galangal, and Turmeric Production in Florida — UF/IFAS
- Ginger and Turmeric — NC Cooperative Extension
- How to grow tropical ginger for at-home spice — Illinois Extension
- Growing Turmeric & Ginger in Florida — UF/IFAS Marion County
Reviewed 23 September 2026. UK timing and container planning recommendations adapt the cited cultivation guidance; warm-region outdoor calendars are not UK planting instructions. Adjust for measured conditions, supplier advice and product labels.