Quick answer
Grow turmeric from a healthy rhizome with visible buds, starting it in warm, lightly moist compost. Give the leafy plant bright light, a roomy draining pot and steady moisture. In the UK, plan for indoor or heated-greenhouse cultivation, with a long season before harvesting. A frost-free patio alone is not enough to make this a dependable crop.
Choose turmeric if you can accommodate a substantial leafy plant for much of the year and would enjoy a small fresh-spice harvest. If you need a reliable outdoor harvest from a short summer, compare other crops in the plant guide directory before committing the space.
Choose culinary turmeric
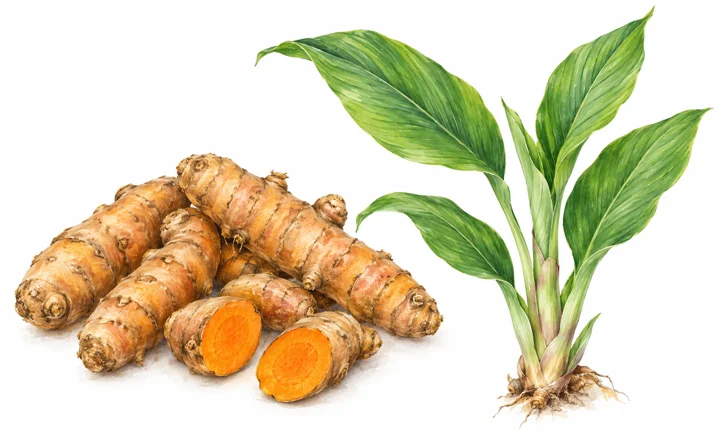
This guide covers Curcuma longa, a tender perennial in the ginger family, Zingiberaceae. Its edible underground part is a rhizome, a modified stem. Buy named culinary planting stock: ornamental Curcuma plants and other species sold under similar common names are not interchangeable. UF/IFAS explains the different turmeric species.
Select firm, plump material with growth buds; reject soft or mouldy pieces. Supermarket rhizomes can be an experiment, but their storage history and plant health are uncertain. Keep a trial pot separate from established crops. A supplier offering healthy planting stock and clear botanical identification is the better starting point.
Match the plant to warmth and light
Kew's cultivation account recommends indoor or heated-glasshouse conditions in temperate regions, with a minimum of 18°C, and cautions that houseplants may yield little useful turmeric. Treat that temperature as a protected-growing baseline, not an optimum or an outdoor planting date.
For light, NC Cooperative Extension describes partial sun of 2–5 hours daily, while noting that fuller sun can increase rhizome growth. The reference card's two hours minimum and four preferred are planning approximations. They assume bright surrounding light; two hours through a shaded window does not guarantee a crop. Acclimatise foliage to stronger sun and provide relief from scorching afternoon exposure.
| Available space | Sensible approach |
|---|---|
| Bright, warm room | Start with one pot; check that mature leaves will fit without crowding the window |
| Heated greenhouse | Plan a long season and monitor overnight temperature as well as daytime heat |
| Unheated greenhouse | Arrange a warm spring start and an indoor autumn destination before planting |
| Outdoor bed in a cool climate | Choose a more reliable crop, or treat turmeric as an experiment with protection |
For example, a sheltered patio can be a summer location for a movable pot, but it does not solve cold spring compost or autumn nights. Record temperatures at pot level rather than relying only on a regional forecast.
Start rhizomes in late winter or spring
For a UK container trial, February–March is a useful planning window if warmth and subsequent light are available. Otherwise start later; an early date in cold compost gains little.
- Keep a small budded piece whole, or divide a larger cluster with a clean knife. Each section needs a viable bud.
- Let cut surfaces dry for a few days.
- Place horizontally with buds upward in fresh, lightly moist potting compost, covering with about 2.5cm of mix. This follows the shallow planting method in UF/IFAS Gardening Solutions.
- Maintain warmth. NC Extension suggests roughly 22–27°C for sprouting, which can take four to six weeks. Do not water repeatedly just because shoots are slow.
- Once shoots appear, provide bright light and increase watering as growth develops. Pot on carefully before roots become crowded.
Label the start date and photograph the original piece. At harvest, this makes it easier to judge how much new growth your conditions supported.
Give rhizomes room and drainage
Use a final pot around 20 litres for one starting rhizome, adapting the five-US-gallon option in UF/IFAS production guidance. A width of at least 35cm is our practical planning allowance for expansion and stability, not a tested yield threshold. Choose a broad, stable base and leave a watering lip.
Use peat-free potting compost that retains moisture while draining freely. Ensure drainage holes are open and empty standing water from saucers. Do not pack several starting pieces into the minimum-size pot.
In a suitable warm border, allow about 45cm between plants, rounded from UF/IFAS field spacing. UF/IFAS Marion County recommends well-drained loam and a pH around 5.5–6.5. Test soil before adjusting it; a container with suitable compost is often easier than changing an unsuitable bed.
Water, feed and maintain the plant
During leafy growth, check below the compost surface and water when it is beginning to dry, allowing excess to escape. Moisture demand changes with leaf area and weather. A small starter pot and a large summer plant should not share a fixed watering schedule.
Use a balanced fertiliser suitable for edible container plants at its label rate, allowing for feed already in the compost. Keep a note of applications so that multiple products do not accumulate. UF/IFAS warns against excess fertiliser salts and feeding dormant plants.
Leave healthy leaves to support growth; remove dead foliage. Check leaf undersides and pot drainage during routine care. Rotate an indoor pot if it leans toward the window, and leave access around it for inspection and watering.
Troubleshoot before adding water or feed
| What you notice | What to investigate | Practical response |
|---|---|---|
| No shoots | Temperature, elapsed time and planting-stock condition | Check conditions first; discard a soft, decaying piece |
| Wilting in wet compost | Poor drainage or rhizome decay | Stop adding water and inspect the root zone |
| Scorched margins after moving the pot | Abrupt light change or drying | Acclimatise more gradually and check moisture |
| Pale stippling or fine webbing | Leaf undersides for spider mites | Separate the pot and seek an appropriate glasshouse control |
| Gradual autumn yellowing | Seasonal slowing versus sudden collapse | Reduce watering as growth declines; inspect if stems become soft |
| Few new rhizomes | Length of warm growth, light and crowding | Review your notes before repeating the same setup |
Kew identifies red spider mite as a possible pest. UF/IFAS advises discarding rotten rhizomes and avoiding reuse of affected growing mix. Yellow leaves alone do not identify a disease; check the whole plant and its conditions.
Harvest and use fresh turmeric
Kew gives roughly seven to ten months to harvest under suitable cultivation, with yellowing lower leaves as a maturity cue. UK calendar time is not equivalent to uninterrupted warm growth. For a spring-started protected crop, October–December is a useful inspection window, not a promise of maturity. Bring any summer outdoor pot into warmth before conditions deteriorate.
Tip a container onto a sheet and loosen the clump by hand; in a bed, dig outside the rhizomes to avoid cutting them. Separate sound new growth from decaying material. Weigh the usable harvest and record the start and harvest dates to assess whether the crop earned its space.
Young turmeric can be used fresh, but thin-skinned rhizomes need prompt refrigeration or processing, as NC Extension explains. Wash soil from the crevices before use. UF/IFAS Gardening Solutions suggests washing, peeling and freezing surplus for later grating. Protect work surfaces and wear gloves if desired: orange turmeric stains readily. Discard mouldy or rotting pieces.
Keep planting stock through winter
Reserve only healthy, labelled material for another season. For the indoor pot method, Kew advises reducing autumn watering and keeping the plant fairly dry through winter, away from draughts. Retain warmth; a damp pot in an unheated shed is not equivalent protection. Stop feeding when dormant and resume care gradually with renewed growth.
Inspect stored pots periodically. Do not keep watering a leafless plant as though it still has a summer canopy, or save suspect rhizomes simply to avoid buying replacements.
For a related crop with narrower foliage and a different flavour, see growing ginger. Both need protected warmth in cool climates; neither is a dependable substitute for a hardy outdoor root crop.
Sources and review basis
- Curcuma longa — Kew, Plants of the World Online
- Turmeric — UF/IFAS Gardening Solutions
- Ginger, Galangal, and Turmeric Production in Florida — UF/IFAS
- Ginger and Turmeric — NC Cooperative Extension
- Growing Turmeric & Ginger in Florida — UF/IFAS Marion County
Published and reviewed 23 September 2026. UK starting and harvest windows, pot width and light figures are practical planning adaptations, not results from a UK yield trial. Florida outdoor calendars and winter survival advice should not be transferred to cold, wet UK gardens. Follow measured conditions and supplier guidance for your own plants.